
Want to know how to blur faces in photos for free? Open a face blur tool, add your photo, and let the AI find and cover each face. Then look for any faces it missed, cover them by hand, and download the new copy. Our free Face Blur tool does all of this inside your browser, so the photo stays on your device.
Below you'll find the exact steps, ways to fix missed faces, and when to use blur, pixelate or a black box. You'll also learn what to check before you post, because a blurred face doesn't always mean a private photo.
Quick answer
| Question | Short answer |
|---|---|
| What's the fastest free way? | Add your photo to the Face Blur tool. It blurs the faces it finds, and then you download. |
| Can faces be blurred automatically? | Yes. Face detection AI finds each face and blurs it. |
| Can I blur multiple faces at once? | Yes. Every face the AI finds is blurred in one go. |
| Can I keep my own face visible? | Yes. Click the box on your face to switch its blur off. |
| What if a face is missed? | Click Draw box and drag over it. |
| Which style hides a face best? | A solid black box. Strong blur comes next. |
| Is my photo uploaded? | No. Our tool page says detection runs on your device. |
| PNG or JPG? | PNG keeps exact pixels. JPG gives a smaller file. |
How to blur faces in photos (quick steps)
These steps follow the buttons on our tool. Most other face blur sites work in a similar way, but their button names may differ.
Step 1: Open the Face Blur tool and add a photo
Go to the Face Blur tool. Drop a photo onto the box, or click to choose one from your files. On a computer, you can also copy an image and paste it with Ctrl + V. The tool accepts JPG, PNG and WebP files. WebP is a newer image format that keeps file sizes small.
Step 2: Let the AI find and blur faces
As soon as the photo loads, the AI looks for faces. Each face it finds gets a box around it, and the inside of that box is blurred. You don't have to press anything for this part.
Step 3: Pick a style, a shape and a strength
Choose Blur, Pixelate or Black box. Then pick the shape: Oval follows the round shape of a head, and Box covers a full rectangle. Last, move the Strength setting. A higher strength hides more detail. For anything sensitive, push it all the way up or use the black box.
Step 4: Check every corner of the photo
This is the step people skip, and it's the one that matters most. Zoom in so you see the photo at full size. Then scan it slowly, piece by piece.
- Look at the background, the edges and any crowd far from the camera.
- Look for faces seen from the side, partly hidden, or wearing hats or masks.
- Look for faces in mirrors, windows, TV screens and phone screens.
- Look for license plates, house numbers, name tags and badges.
If you spot anything, use Draw box and drag over it.
Step 5: Download PNG or JPG
Click Download PNG or Download JPG. The tool page says the file is saved at the photo's original size. To start over with a new image, click Another photo.
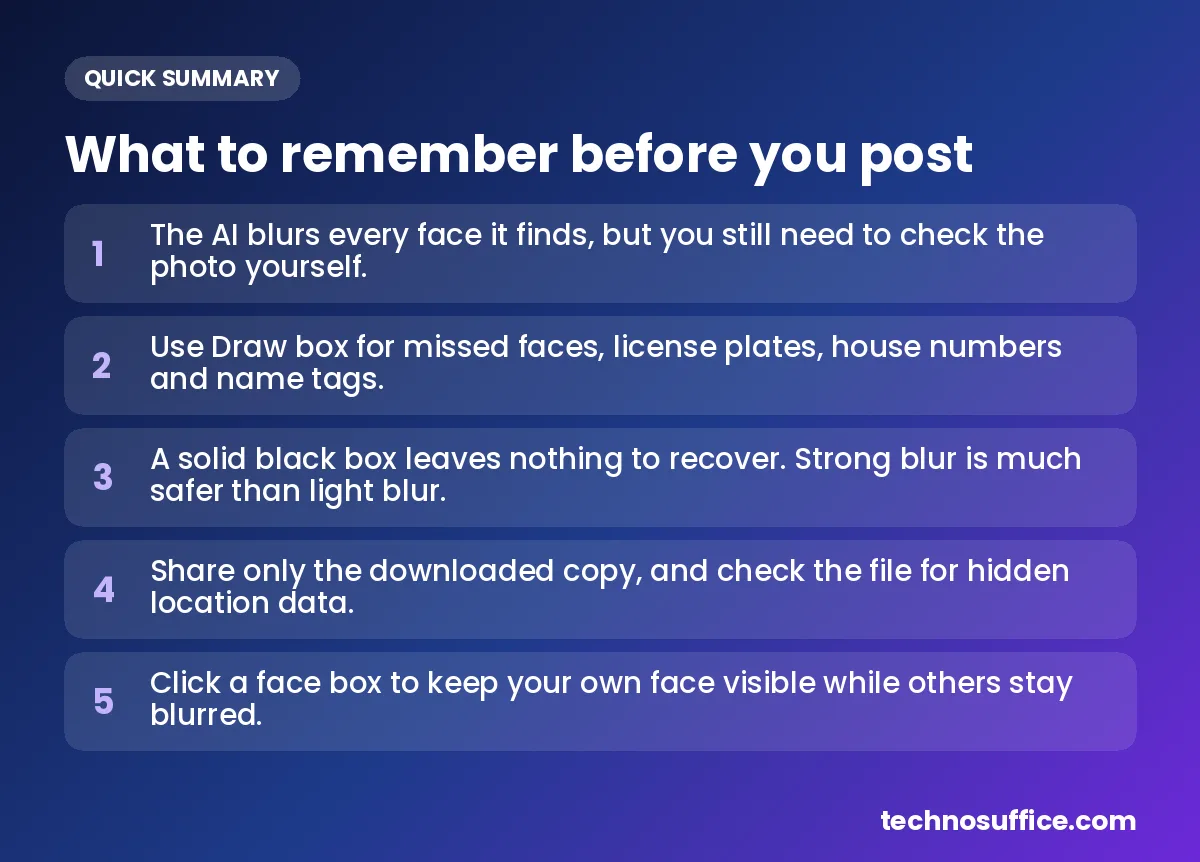 What to remember before you post
Blur multiple faces and keep one visible
Blur all, Show all and Show boxes
Group photos are where automatic blur saves the most time. Covering 20 faces by hand is slow, while the AI handles them all at once. Blur all turns the blur on for every face the AI found. Show all works the other way and turns the blur off for every face. This helps when you only want to hide one or two people. Show boxes shows the outline of each detected face, so you can see what the AI found and what it skipped.
Click a box to keep your own face visible
Say you're posting a photo of yourself at a crowded street fair. You want your face to show, but not the strangers behind you. Click the box on your face, and its blur switches off. Click it again to turn the blur back on. Every other face stays blurred.
Group photos and crowds
In big crowds, faces at the back are often tiny. The AI is more likely to miss those, so plan to add a few boxes by hand. If the far background doesn't matter, you can also cut it out with an image cropper before you blur. Cropping removes those pixels for good, which is the safest result of all.
How automatic face blur works (in plain words)
The tool uses face detection. That's software that looks at a photo and draws a box around each face it finds. The box is called a bounding box, and the blur goes inside it.
Our tool uses Google MediaPipe, a free toolkit from Google that helps apps find faces and other things in images. According to the MediaPipe face detection docs, its face detector is built on BlazeFace. BlazeFace is a small, fast model, which means it can run on a normal phone or laptop. It can find several faces in one photo and marks six points on each one, such as the eyes and the tip of the nose.
The AI also has a confidence threshold. That's how sure it must be before it calls something a face. The same docs list a default of 0.5 on a scale from 0 to 1. A higher setting means fewer wrong boxes, but more missed faces. A wrong box is called a false positive, like a round clock marked as a face. A real face it skips is a missed detection.
Once the boxes are set, the tool covers each one. A Gaussian blur mixes each pixel with the pixels around it, so the details fade into a soft smear. Pixelate turns the area into large colored squares. A black box paints the area over with one solid color.
Face detection is not facial recognition. Recognition tries to match a face to a name. Detection only finds where faces are. It has no idea who anyone is.
What to do when a face is missed
Use Draw box for small, side-view or far-away faces
Click Draw box, then drag a rectangle over the face. Make it a little bigger than the face, so hair and ears are covered too. You can draw as many boxes as you need. The tool's own FAQ admits that very small or turned-away faces can be missed by any detector. That's honest, and it's true of every tool like this.
Why detectors miss faces
Distance plays a big part. The MediaPipe docs describe a short-range model that works best for faces within 2 meters of the camera. Its full-range model handles faces within 5 meters. In a wide street shot, people farther away than that can show up as just a few pixels. Faces turned away, half hidden, blurry, or covered by hats and masks are harder to spot too.
Blur number plates, house numbers and name tags too
A face isn't the only thing that points to a person. A license plate can lead to a car's owner. A house number plus a street sign can point to a home. Use Draw box on these as well. The tool page suggests it for number plates, names and house numbers.
| Problem | Likely cause | Fix |
|---|---|---|
| A face in the background isn't blurred | Too small or too far away | Use Draw box over it |
| A side-view face is skipped | Only part of the face is visible | Draw a box by hand |
| A poster or clock is blurred | False positive | Click that box to switch its blur off |
| Blurred face still looks familiar | Strength set too low | Raise Strength or switch to Black box |
| Hair or ears show at the edges | Box is tight around the face | Draw a larger box over the area |
| A face shows in a mirror or screen | Reflections are easy to miss | Zoom in and add a box |
Blur vs pixelate vs black box
All three hide faces, but they don't hide them equally well. Here's how they compare.
| Style | What it does | How much it hides | Looks |
|---|---|---|---|
| Blur | Softens detail by mixing nearby pixels | Light blur hides little. Strong blur hides a lot. | Natural and soft |
| Pixelate | Turns the area into big squares | Depends on square size. Bigger squares hide more. | Blocky, like on TV news |
| Black box | Covers the area with a solid color | Hides everything under it | Plain and obvious |
Which one to use, by situation
| Situation | Best choice |
|---|---|
| Strangers in a social media post | Blur at medium to high strength |
| Children's faces | Strong blur or black box |
| Screenshots, IDs and documents | Black box |
| License plates | Black box or heavy pixelate |
| Real estate or product photos | Blur at high strength, so the photo still looks clean |
Covering private parts of an image so people can't see them is called redaction. For true redaction, as with ID numbers or names, a black box is the right pick.
Can a blurred face be recovered?
This part needs a careful answer. Researchers have tried methods called deconvolution and AI de-blurring. These use math or AI to sharpen a blurred image back toward the original. A research paper on privacy blur argues that blur keeps most facial information, so it can be fully or partly reversed. The same authors say strong pixelation and cropping throw information away for good. Another study disagrees about pixelation and found it can be partly reversed too. Both are preprints, which means papers shared before formal review, so they aren't final standards.
The safe takeaway is simple. A solid box leaves nothing to recover. Strong blur is much safer than light blur. Our tool's FAQ adds that the downloaded image only holds the blurred pixels. That only helps if you share the downloaded copy and never the original.
Safe settings for kids and sensitive photos
For children, protest photos or anything tied to evidence, use Black box. If you prefer a softer look, set Strength to its highest level. Pick Box over Oval for these, since a rectangle covers hair and ears too.
Is it private? Browser-only processing
What "runs on your device" means
Many online tools send your photo to their server. The work happens there, and then they send a result back. Our tool page says face detection runs in your browser instead. Your own phone or computer does the work, and the photo isn't uploaded anywhere.
Why that matters compared with upload tools
If you're hiding faces to protect people, it makes little sense to send the unblurred photo to a stranger's server first. Some upload-based sites also cap how many free photos you can process each day. Browser-only tools skip both problems. The limit is your device's speed, so a very large photo may take longer on an older phone.
Check the photo's metadata too
Blurring changes what people see. It doesn't change the hidden data inside the file. Photos can carry EXIF metadata: hidden details like the date, the camera model and sometimes GPS coordinates. GPS coordinates are numbers that show exactly where the photo was taken.
We haven't confirmed whether our tool removes this data, so check your saved file. Here's how:
- Windows: Right-click the file, choose Properties, open the Details tab, and click "Remove Properties and Personal Information."
- iPhone: To stop location tags on future photos, go to Settings > Privacy & Security > Location Services > Camera and choose Never.
- Android: Open your camera app's settings and turn off the location tag option. The menu name differs from phone to phone.
Common mistakes to avoid
Posting the original by accident
This happens more often than you'd think. The blurred copy and the original sit side by side in your downloads or camera roll, and you pick the wrong one. Rename the blurred file right away, such as adding "blurred" to the name. Then open it once before you post it.
Light blur on a large face
A soft blur on a small face in the background may be fine. The same setting on a close-up face often isn't. People can still recognize someone from face shape, hair and skin tone. The bigger the face is in the photo, the higher the strength should be.
Leaving other clues behind
A blurred face doesn't help if the person still stands out. Watch for:
- A unique tattoo, team jersey, uniform or bright jacket
- A name tag, school badge or ID lanyard
- A caption or tag that names the person
- Faces in mirrors, windows, sunglasses or screens
- Readable text on a laptop or phone screen
To remove a small object instead of covering it, our Remove Object from Photo tool can erase it.
When to blur faces: US examples
Posting photos of strangers or children online
Before you post a beach day, a parade or a birthday party, look at who else is in the frame. Other people's kids are the most common case. Many parents don't want their children's faces online, so blurring them is a polite default.
School, team and event photos
Many schools, camps and youth sports leagues ask families to sign photo consent forms. If one child on the team doesn't have consent, blur that child's face before you share the photo. Social media managers who plan posts ahead can build this check into a social media content calendar, so no photo goes out unchecked.
Real estate listings
Listing photos sometimes catch a family photo on a shelf, a neighbor in a yard, or someone's reflection in a mirror. Blur those faces and any house numbers next door before the listing goes live.
News, events and protest photos
People at a protest may face real harm if they're identified. If you share crowd photos, use strong blur or black boxes on everyone who isn't a public figure. Remember the people far in the background too.
Screenshots, IDs and case files
Screenshots of video calls, ID cards and case files often hold faces and personal text. Use Black box for both. Covering everything that could identify someone is called anonymizing the image.
COPPA and photo consent basics (not legal advice)
COPPA is a US law that limits how websites and apps collect personal data from children under 13. The FTC (Federal Trade Commission) is the government agency that enforces it. The COPPA Rule in the Federal Register counts a photo or video with a child's image as personal information. It also mentions existing FTC guidance that lets operators blur facial features in kids' photos before posting.
COPPA governs online services, not a parent sharing a family photo. Still, it shows how seriously US rules treat children's images. This is general information, not legal advice. If you run a website or app for kids, talk to a lawyer.
Tips to protect privacy before you take the photo
Frame out bystanders
The easiest face to protect is one that never ends up in the photo. Step closer, change your angle, or wait a moment for people to walk past. For group shots, photos taken from behind can still tell the story without showing anyone's face.
Turn off camera location tags
Turn off location tags in your camera settings before you shoot. Then you don't have to remember to strip GPS data from every file later.
Ask for permission
If someone is clearly in your photo, just ask. A quick "Mind if I post this?" saves a lot of trouble. For children, ask a parent. If the answer is no, blur the face or don't post the photo.
Frequently Asked Questions
Is the Face Blur tool free?
Yes. Our tool page lists it as a free online tool. You can blur faces, draw extra boxes and download the result in PNG or JPG without paying.
Are my photos uploaded when I blur faces online?
With our tool, no. The tool page says face detection runs in your browser, and photos are never uploaded. Other sites may work differently, so read their privacy notes. If a site mentions daily limits or server processing, your photo is probably being uploaded.
Can a blurred face be unblurred?
A light blur can sometimes be partly undone, according to research on de-blurring methods. Researchers disagree on how safe pixelation is. A solid black box leaves nothing behind to recover. For real privacy, use strong blur or a black box, and share only the downloaded copy.
What if the tool misses a face?
Click Draw box and drag over the face. Small, far-away and turned-away faces are the ones most often missed by any detector. That's why it pays to zoom in and check the whole photo before you download.
How do I blur only one face and keep mine visible?
To keep your face, click its box, and the blur on it switches off. To blur just one other person, click Show all to turn every blur off. Then click only that person's box to blur it again.
Should I download PNG or JPG?
PNG keeps every pixel exactly as it is, but the file is bigger. JPG makes a smaller file and loses a little quality. Use PNG for documents and screenshots, and JPG for everyday photos you'll post online. If the file is still too big, run it through an image compressor.
How do I blur faces on iPhone or Android?
Because the tool runs in a web browser, you can open the same page on your phone. Tap the upload area to choose a photo, follow the same steps, and save the download to your photos. Large images may take a bit longer on older phones.
Wrapping up
Blurring faces takes a minute: add the photo, let the AI do the first pass, fix what it missed, and download. The careful part is the final check. Zoom in, look for plates and reflections, and post only the blurred copy. When in doubt, use a black box.
Try the free Face Blur tool on your next photo before you share it. If your business needs privacy-safe images for ads, listings or social posts at scale, our graphic design team can help.